A polycarbonate structure is only as strong as what it’s standing on. I’ve seen too many beautiful carports, greenhouses, and patio covers fail not because of the panels or the framing, but because someone rushed or skipped the foundational work. Think of it this way: you can buy the strongest, most UV-resistant multiwall polycarbonate sheet on the market, but if the base it’s attached to shifts, heaves, or sinks, the entire project is compromised. Foundation preparation isn’t the glamorous part of the build, but it’s arguably the most critical. It’s the unseen hero that ensures your investment lasts for decades, standing firm against wind, snow, and the test of time. This guide will walk you through the professional steps, from initial dirt work to the final anchor bolt, to get your polycarbonate project started on absolutely solid ground.
Why Your Polycarbonate Structure’s Foundation is Non-Negotiable
Let’s clear up a common misconception right away. Polycarbonate panels are incredibly strong and lightweight, but the structure they create acts as a sail. It catches wind. It holds snow. The framework, whether aluminum or steel, transmits all these forces directly down to the foundation. A poor foundation leads to a cascade of problems: door frames that warp and won’t close, panels that develop stress cracks at the fasteners, and persistent leaks at the seams. In extreme cases, the whole structure can rack and collapse. Proper foundation preparation does three essential things. First, it provides a perfectly level and square base, which makes erecting the frame infinitely easier. Second, it distributes the structure’s weight and environmental loads over a sufficient area of soil to prevent settling. Third, it securely anchors the building against uplift from strong winds. Skipping this phase to save a day or a few dollars is the most expensive mistake you can make in the long run.
Step 1: Comprehensive Site Analysis and Planning
Never start digging on day one. Your first task is a thorough site analysis. Walk the area where you plan to build. Look for overhead obstructions like power lines or tree branches. More importantly, look at the ground. Where does water flow when it rains? Is the area naturally soggy or well-drained? The goal is to build on high, dry ground. Next, you must understand your local building codes. Many municipalities have specific requirements for footings, especially for attached structures like carports or covered patios. They will specify frost depth—how deep you must dig to get below the frost line to prevent heaving—which is crucial for colder climates. Finally, call 811 or your local utility marking service before any excavation. This free service will mark the location of underground gas, water, electric, and communication lines. Hitting one is dangerous, costly, and will derail your project instantly.
Conducting a Simple Soil Bearing Test
You don’t need to be a geotechnical engineer, but you should understand your soil type. Sandy, gravelly soils drain well and offer good bearing capacity. Clay soils hold water, expand when wet, and have poorer bearing capacity. A simple hand test can tell you a lot. Grab a handful of moist soil and squeeze it. If it forms a tight, slick ball, you have heavy clay. If it crumbles easily, it’s more sandy or loamy. For larger projects or questionable soil, consulting a professional for a bearing capacity test is a wise investment. The soil type directly influences your foundation design. Poor soil may require wider footings, deeper piers, or even a reinforced concrete slab to adequately spread the load.
Step 2: Selecting and Designing the Right Foundation Type
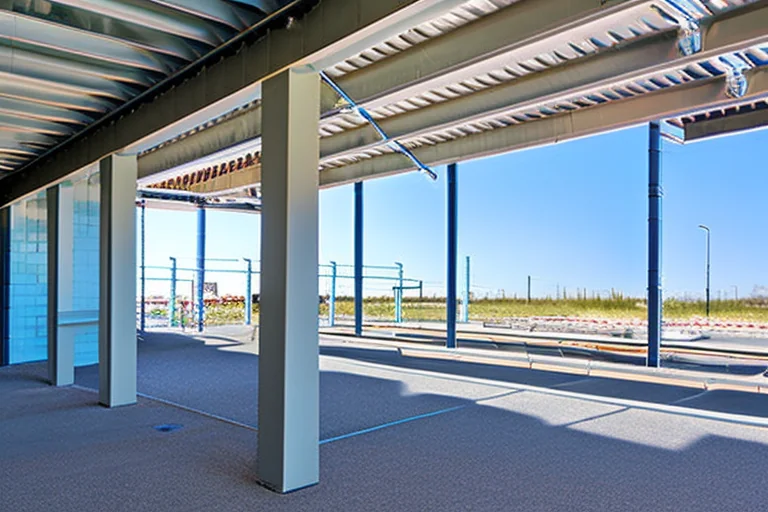
Not all polycarbonate structures need the same base. The foundation type depends on the structure’s size, purpose, and your local climate. For smaller, freestanding structures like hobby greenhouses or garden sheds, a simple perimeter of concrete piers or a gravel pad with treated wood timbers may suffice. For larger carports, commercial canopies, or enclosed polycarbonate buildings, more substantial foundations are required. A continuous concrete footing, often formed with wood, is a common and excellent choice. It provides a continuous load-bearing wall below grade. For the ultimate in stability and a clean finished floor, a monolithic concrete slab with thickened edges is ideal. This is often used for workshops or garages clad in polycarbonate panels. Remember, the foundation must be designed to handle both the dead load (weight of the structure itself) and the live loads (wind, snow, and occupancy).
Foundation Options for Common Polycarbonate Projects
Let’s break down the best matches. For a typical backyard greenhouse, concrete piers at each corner and mid-span are very effective. They are cost-efficient and allow for excellent drainage underneath. For a polycarbonate carport protecting your vehicles, a continuous concrete footing or a full slab is recommended to handle the larger footprint and higher wind load. If you’re building a patio cover attached to your house, you’ll likely need deep concrete footings for the free-standing posts and a proper ledger board attachment to your home’s structure, following code for flashing and waterproofing. Each option requires precise layout, squaring, and leveling—the three mantras of good foundation work.
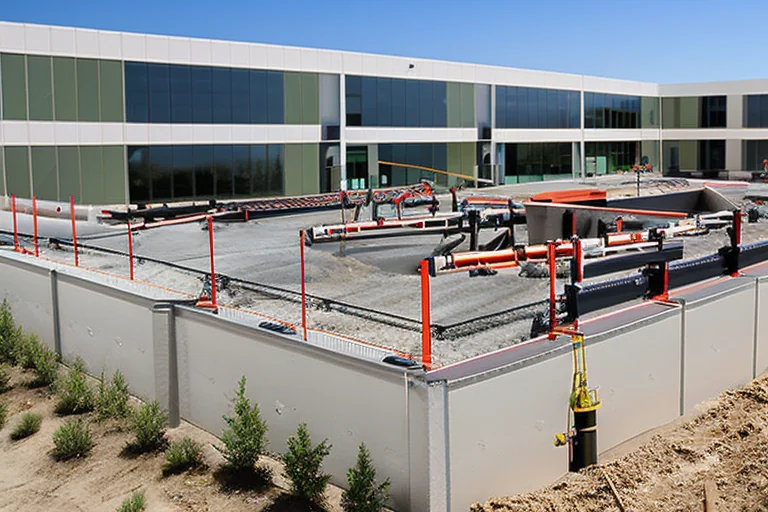
Step 3: Excavation, Formwork, and Drainage
Now the physical work begins. Using your planned dimensions, carefully lay out the foundation perimeter with stakes and string. Use the 3-4-5 triangle method (or a builder’s laser) to ensure all corners are perfectly square. Excavate to the required depth, which must be below the local frost line for footings. The width of your excavation should be wider than the finished footing to allow for formwork. Speaking of formwork, building sturdy, straight forms from 2x lumber is essential. They define the shape of your concrete. Before pouring, consider drainage. It is often wise to place a few inches of gravel at the bottom of the trench to improve drainage and prevent water from pooling under the concrete. For slab-on-grade foundations, a full bed of compacted gravel and a vapor barrier are standard procedure.
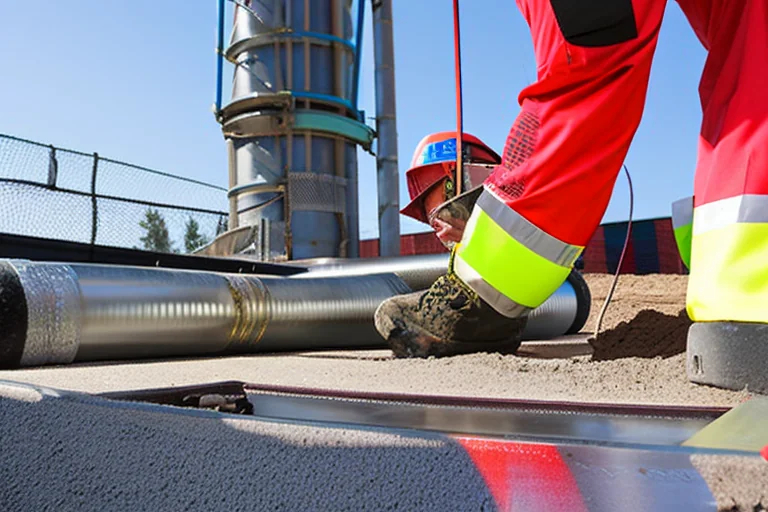
Step 4: The Concrete Pour and Critical Anchor Placement
Use a concrete mix appropriate for footings, typically a minimum of 2500 psi strength. During the pour, use a shovel or a concrete vibrator to eliminate air pockets and ensure the concrete flows into all corners of the form. The most crucial step during the pour is the placement of your anchor system. This is the literal connection between your foundation and your polycarbonate structure’s frame. For metal frameworks, J-bolts or cast-in-place anchor bolts are standard. They must be set precisely according to the frame manufacturer’s template. Use a plywood jig to hold them in the exact position, ensuring they are perfectly plumb. The bolt threads must be protected from concrete splatter. The top of the concrete must be leveled and finished smoothly. After pouring, the concrete must cure slowly and evenly. Keep it moist and covered with plastic sheeting for at least several days to achieve full strength. Rushing this curing process leads to weak, brittle concrete.
Post-Installation: Backfilling and Final Grading
Once the concrete has fully cured (typically after 7 days), you can carefully remove the wooden forms. The backfill process is important. Use clean, native soil or gravel to backfill around the new foundation, tamping it down in layers to prevent future settling. The final grading around the structure is your last defense against water. Slope the earth away from the foundation on all sides at a minimum grade of 6 inches over 10 feet. This directs surface runoff away, preventing water from seeping down and undermining your hard work. This is especially vital for structures that will house sensitive equipment or, in the case of greenhouses, protect plants.
Common Foundation Mistakes and How to Avoid Them
Learning from others’ errors saves time and money. The number one mistake is inadequate depth, leading to frost heave in cold climates. Always dig below the code-specified frost line. The second is poor anchor bolt placement. Bolts set out of alignment mean drilling into cured concrete later, which is never as strong. The third is neglecting drainage and grading, inviting water problems for the life of the structure. Finally, using undersized or rotten wood for formwork can lead to a blowout during the pour, creating a huge mess and wasted concrete. Take your time with each preparatory step. A well-built foundation is invisible once the project is complete, but its benefits are seen every day in a structure that remains straight, secure, and leak-free for years. For long-term care, understanding seasonal maintenance routines is the next step to preserving your investment.
Ready to build on a foundation of expertise? Don’t let uncertainty about base preparation delay your next project. Contact Our Polycarbonate Experts Today for personalized guidance, or View Our Full Product Catalog to explore the premium panels and framing systems designed for lasting performance. For comprehensive guides on every aspect of installation and care, Access Our Complete Resource Library.