For any RV owner, the question isn’t *if* you need proper storage, but *what kind* is best. Leaving a significant investment exposed to relentless sun, hail, bird droppings, and seasonal debris is a surefire way to accelerate depreciation and costly repairs. That’s where a dedicated RV carport or storage structure comes in, transforming from a luxury to a necessity. But not all shelters are created equal. The modern solution moves beyond flimsy tarps and dark, oppressive metal buildings. Today, we’re building smarter with advanced materials like polycarbonate, which offers a perfect blend of durability, light, and protection. As a construction professional, I’ve seen the evolution firsthand, and I’m here to guide you through planning, building, and maintaining the ideal recreational storage solution for your lifestyle.
Planning Your RV Carport or Storage Structure
Jumping straight to materials is tempting, but a successful project starts with solid planning. First, accurately measure your RV or largest item. Don’t just account for length and height; include accessories like ladder racks, air conditioners, and satellite dishes. A good rule is to add at least 3 feet in length and 2 feet in width and height to your measurements for comfortable maneuvering and air circulation. Next, consult your local building department. Zoning laws, setback requirements, and permit needs vary dramatically. Some areas have strict rules on “accessory structures,” especially for larger RVs. Ignoring this step can lead to fines or being forced to dismantle your new carport.
Location is equally critical. Choose a level site with good drainage to prevent water pooling. Consider the path of the sun; orienting the structure to minimize afternoon sun exposure on the RV’s interior can keep it cooler. Also, think about access. You’ll need a clear, firm path for both your RV and any delivery or construction vehicles. Finally, decide on the foundation. For permanent structures, concrete slabs are the gold standard, offering a solid, level base. For more flexible or budget-friendly options, consider reinforced gravel beds or concrete pier blocks, which are often perfectly suitable for prefabricated metal frame kits.
Why Polycarbonate is the Superior Choice for Recreational Storage
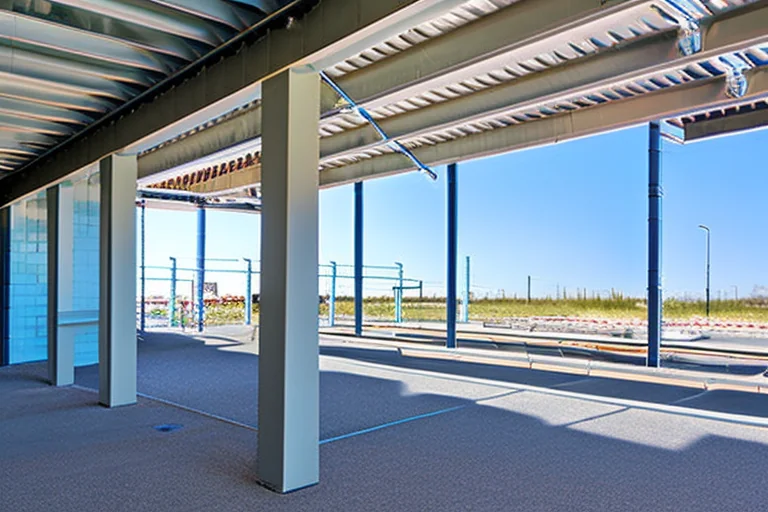
Once your plan is set, material selection becomes the most important decision. Traditional options like corrugated metal or PVC roofing have significant drawbacks. Metal is noisy, prone to condensation (which leads to interior rust and mold), and can dent from hail or falling branches. Solid roofing creates a dark, cave-like interior. This is where multiwall polycarbonate sheets shine. These engineered panels are constructed with two or more layers separated by internal ribs, creating air pockets that provide exceptional thermal insulation and structural strength with minimal weight.
The benefits are substantial. First is legendary impact resistance—polycarbonate is virtually unbreakable, offering superior protection against hail, wind-blown debris, and accidental impacts compared to glass or fiberglass. Second, they come with a co-extruded UV protective layer that filters harmful rays, preventing the yellowing and degradation of the panel itself *and* protecting your RV’s paint and interior fabrics from sun fade. Third, they offer excellent light transmission. A polycarbonate roof bathes your storage space in soft, diffused natural light, eliminating the need for interior lighting during the day and making it easy to work on your vehicle or find gear. For those seeking a balance of privacy and light, textured or patterned panels are a fantastic option, reducing glare while maintaining a bright interior.
Key Polycarbonate Panel Specifications to Understand
When selecting panels, you’ll encounter a few key terms. Thickness, measured in millimeters (e.g., 6mm, 8mm, 10mm), directly relates to insulation value (R-value) and load-bearing capacity. For most RV carports in moderate climates, 6mm or 8mm is sufficient. The “U-factor” measures heat transfer; a lower U-factor means better insulation. For color, clear panels offer the highest light transmission, while bronze or opal tints can reduce heat gain and glare. Always ensure the panels you purchase are rated for direct outdoor exposure and include the UV protective layer on the top surface.
Installation Insights and Best Practices
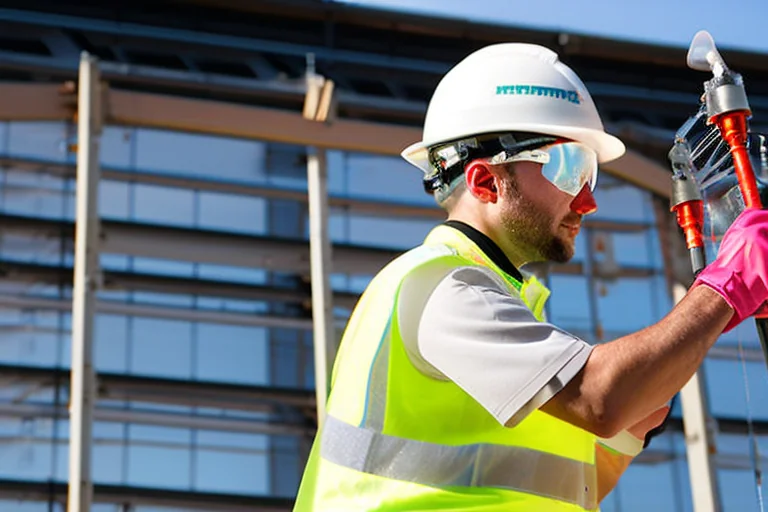
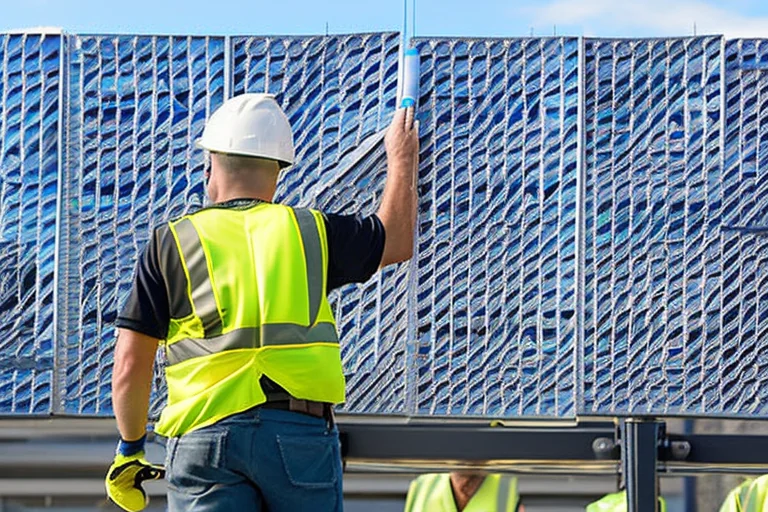
Proper installation is non-negotiable for performance and longevity. Whether you’re using a kit or custom-building a frame, start with a square and level foundation. The structural frame, typically galvanized steel or aluminum, must be robust enough to handle snow loads in your region and the dead weight of the panels. When mounting the polycarbonate sheets, remember they expand and contract with temperature changes. Never install them tight. Use proper polycarbonate-specific fasteners with neoprene or EPDM rubber washers to create a watertight seal without over-compressing the panel.
Always install panels with the UV-protected side facing outward (it’s usually marked on the protective film). The most critical step is sealing the ends of each panel with provided closure strips and aluminum end caps or tape. This seals the internal channels from dust, insects, and moisture, which can lead to algae growth and reduce light transmission. If you’re tackling this as a DIY project, taking your time with these details is crucial. For complex designs or large structures, consulting with a professional or following detailed expert installation tips can save time and prevent costly mistakes.
Maintenance and Long-Term Care for Your Polycarbonate Shelter
One of the biggest advantages of a polycarbonate carport is its low maintenance. However, “low” doesn’t mean “none.” An annual cleaning is recommended to maintain optimal light transmission and appearance. Use a soft cloth, sponge, or brush with a mild soap solution (like dish soap) and lukewarm water. Always rinse thoroughly with clean water. Avoid abrasive cleaners, scouring pads, or harsh chemicals like acetone, gasoline, or ammonia-based window cleaners, as these can damage the UV coating and surface.
Periodically inspect the structure. Check fasteners to ensure they haven’t loosened, clear gutters or drainage paths of leaves and debris, and examine the end caps and seals to ensure they remain intact. If you live in a heavy snow area, it’s wise to gently remove accumulations over about 6 inches, using a soft broom and pushing in the direction of the panel ribs. While polycarbonate is strong, preventing excessive point loads is good practice. With this simple care routine, a quality polycarbonate structure can provide decades of reliable service.
Beyond the RV: Versatile Applications for Your Storage Structure
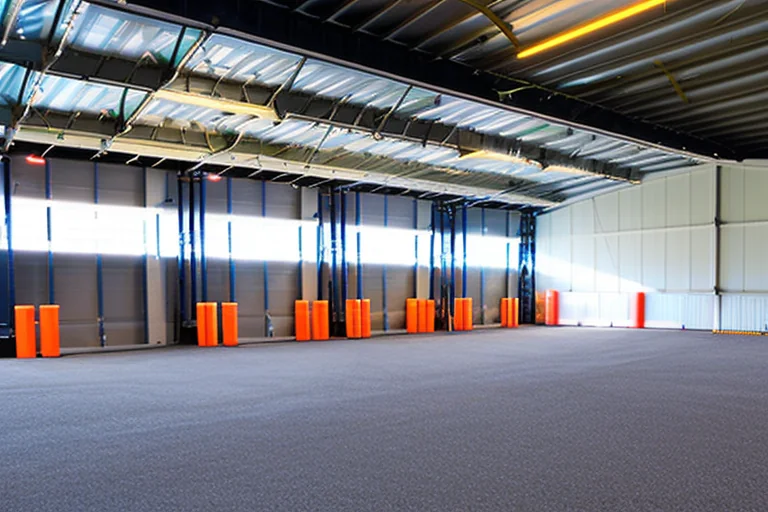
While designed for an RV, the utility of a well-built polycarbonate structure extends far beyond. It becomes a versatile covered space for your entire recreational arsenal. It can shelter a boat during the off-season, protect a collection of ATVs or motorcycles, or provide a dry, bright space for lawn tractors and gardening equipment. Many homeowners use one bay for the RV and another as a covered patio or outdoor workshop. The diffused light and weather protection make it an ideal multi-purpose space, effectively increasing your usable property area and protecting all your high-value toys from the elements in one centralized, accessible location.
Investing in a polycarbonate RV carport is an investment in peace of mind and the longevity of your recreational assets. By choosing a material that combines brute strength with beautiful, functional light, you’re building a solution that is as practical as it is prudent. Ready to move forward with your project? The right materials and knowledge make all the difference. View Our Full Product Catalog to explore the range of polycarbonate panels and framing systems available, and don’t hesitate to Contact Our Polycarbonate Experts Today for personalized advice tailored to your specific storage needs and local climate.